

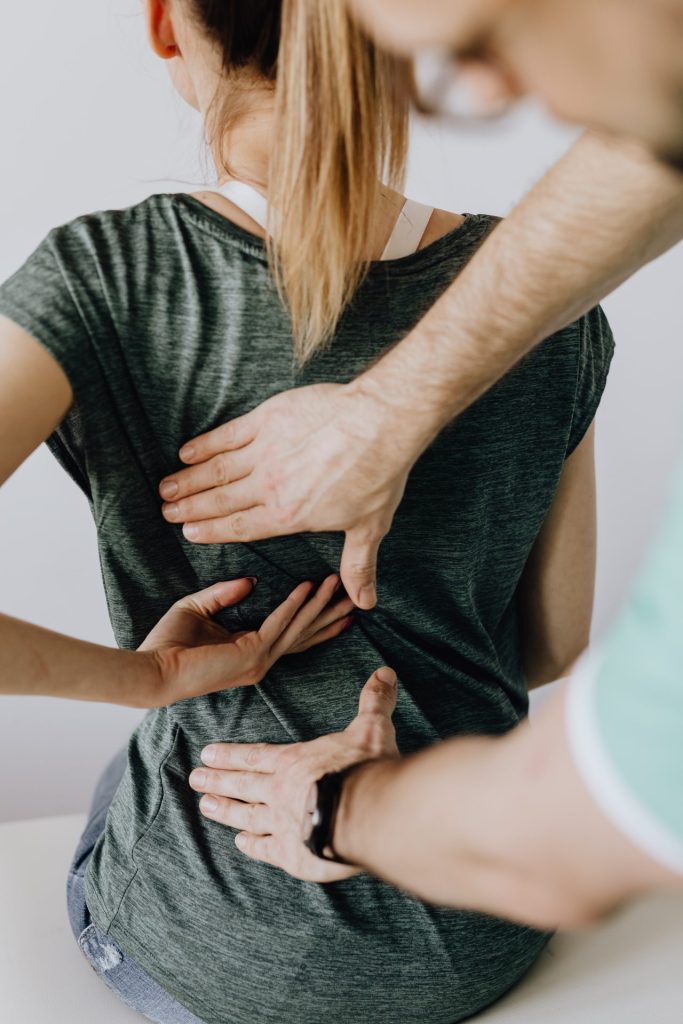
If you’re dealing with back pain, yoga might be the solution you’ve been looking for. Yoga is a mind-body practice that’s often recommended for treating back pain and the stress that comes with it. By practicing certain poses designed specifically for relieving back pain, you can relax and strengthen your body. Even just a few minutes of yoga each day can help you become more aware of your body, allowing you to identify areas of tension and imbalance. This awareness can help you bring your body back into alignment.
In this blog post, we’ll explore how to practice yoga to relieve back pain. With various styles and practices of yoga available, you can find one that suits your preferences, whether you’re interested in meditation, spirituality, strength, or flexibility.
The 7 Effective Yoga poses to relieve lower back pain
According to the National Institutes of Health, 75–85% of Americans will experience lower back pain at some point in their lives. When your lower back is not functioning properly, it can cause discomfort, impact your daily activities, and even affect your mental well-being. By incorporating yoga into your routine, you can work towards alleviating these issues and improving your overall health and well-being. Regardless of the type of yoga you choose, the practice can offer several health benefits, including relief from lower back pain.
Here are 7 yoga poses for lower back pain:
1. Cat-cow pose
The cat-cow pose, also called chakra-vakasana in Sanskrit, is a soothing yoga position that involves moving your spine and body in a rhythmic way. This pose is great to warm up before doing yoga or to ease tension in your back, neck, and shoulders. Here’s how to do the cat-cow pose:
1. Start on your hands and knees, with your wrists under your shoulders and your knees under your hips for a strong base.
2. For the cow pose, breathe in deeply as you arch your back, lifting your head and tailbone up. Let your belly relax and sink toward the floor. This stretch helps open up your chest and improve your posture.
3. For the cat pose, breathe out as you round your back, lowering your head. Bring your chin to your chest and tighten your core by pulling your belly button in. This pose boosts spine flexibility and strength, and eases neck and back tension.
4. Repeat these movements, breathing in for the cow pose and breathing out for the cat pose, for 5–10 breaths.
You can make this pose more interesting by adding hip movements or rotating your torso in circles.
2. A downward-facing dog
The downward-facing dog pose, also known as Adho Mukha Svanasana in Sanskrit, is a popular yoga position in studios and gyms. It is versatile and can be used for resting, transitioning, or warming up during yoga sessions. To do this pose, start on your hands and knees with your wrists under your shoulders and knees under your hips. Spread your fingers wide, press your palms into the ground, and lift your hips up and back to create an inverted V-shape. Keep your spine long, shoulders relaxed, and gaze towards your navel. Hold the pose for a few breaths before lowering your knees.
Practicing the downward-facing dog pose has many benefits. It stretches the hamstrings, calves, and spine, improving flexibility. It also strengthens the arms and legs, promoting muscle stability. This pose can boost circulation, reduce stress, and increase energy levels. Regularly doing the downward-facing dog pose can enhance both physical and mental well-being.
3. Child’s Pose
The child’s pose is a widely recognized and revered yoga position that serves as an ideal resting pose during a yoga session. This gentle and comforting posture offers a myriad of benefits, including mental tranquility, stress relief, and physical tension release.
To assume the child’s pose, begin by positioning yourself on a yoga mat, on all fours. Align your big toes together and gently lower your body, resting it on your heels. Maintain a hip-distance gap between your knees and allow your forehead to rest peacefully on the mat. While in this position, you can either let your arms gracefully rest alongside your body, with your palms facing upwards, or extend them forward, elongating them in front of you.
As you settle into the child’s pose, remember to take slow, deep breaths, focusing on both the relaxation of your body and the stillness of your mind. This pose can be held for as long as desired, as it is frequently employed as a means of rejuvenation and restoration within a yoga routine.
4. Standing Forward Bend
The Standing Forward Bend, also referred to as Uttanasana in Sanskrit, is a yoga asana that effectively elongates the entire spinal column, stretches the hamstrings and calves, and promotes mental tranquility while alleviating stress. The following steps outline the proper execution of this posture:
1. Commence in Mountain Pose, assuming an upright stance with feet positioned hip-width apart and arms resting naturally at the sides.
2. On an exhalation, gradually hinge forward from the hips, extending the hands towards the floor. If reaching the floor is unattainable, alternative options include utilizing blocks for support or grasping onto the shins.
3. Allow the head to hang freely, enabling the neck to relax.
4. If necessary, slightly flex the knees to alleviate any tension in the lower back or hamstrings.
5. Engage in deep, mindful breathing and sustain the pose for a duration of 30 seconds to 1 minute.
6. To conclude the posture, inhale deeply and gradually ascend to an upright position, sequentially rolling up the spine one vertebra at a time.
5. Sphinx Pose
Sphinx Pose, also referred to as Salamba Bhujangasana or Supported Cobra Pose, is a gentle yoga posture that promotes spinal flexibility and enhances the strength of the back, chest, and shoulders.
To execute Sphinx Pose, adhere to the following instructions:
1. Begin by lying face down on your yoga mat, with your legs extended behind you, maintaining a hip-width distance between them. Place your hands on either side of your shoulders.
2. Press your forearms and palms firmly into the mat, simultaneously lifting your head, chest, and upper torso off the ground.
3. Ensure that your elbows remain close to your sides, while allowing your shoulders to relax away from your ears.
4. In a gentle manner, draw your shoulder blades down and back, creating an opening in your chest and elongating your spine.
5. Maintain the pose for a duration of 30 seconds to one minute, focusing on deep breathing and allowing yourself to relax into the stretch.
6. To conclude the pose, gradually lower your torso back to the mat and rest with your head turned to one side.
6. Knees to Chest With Slow Rock
The knees-to-chest slow rock exercise is a highly effective and straightforward technique for relieving lower back pain, improving flexibility, and strengthening the core. To perform this exercise, begin by lying on your back with your knees bent and your feet flat on the floor. Then, lift your knees towards your chest and wrap your arms around them, either by holding your shins or placing your hands behind your knees.
Once you have successfully brought your knees towards your chest, it is time to incorporate the slow rock. Gently sway back and forth, ensuring that your lower back remains firmly pressed against the floor. The goal is to enhance the stretch in your lower back and hips, allowing it to intensify with each gentle movement.
To maximize the benefits of this exercise, it is essential to maintain a deliberate and controlled pace. Avoid rushing through the motions or rapidly bouncing your knees up and down. Instead, focus on executing slow and steady movements that allow the stretch to gradually deepen. By practicing this exercise with mindfulness and precision, you can optimize the positive impact on your lower back, flexibility, and core strength.
7. Reclined Pigeon Pose
The Reclined Pigeon Pose, also referred to as Supta Kapotasana, is a yoga asana that offers numerous benefits for the hip, thigh, and groin regions. Additionally, it is renowned for its ability to alleviate lower back tension and enhance flexibility.
To execute the reclined pigeon pose, adhere to the following instructions:
1. Begin by lying on your back and drawing your knees towards your chest.
2. Proceed to cross your right ankle over your left knee, ensuring that your right foot is flexed. Gently exert pressure on your right knee, pushing it away from your body. This action should generate a stretching sensation in your right hip and thigh.
3. If you find yourself at ease, you may elevate your left foot off the ground and grasp the back of your thigh with both hands. This modification will intensify the stretch in your right hip and glute muscles.
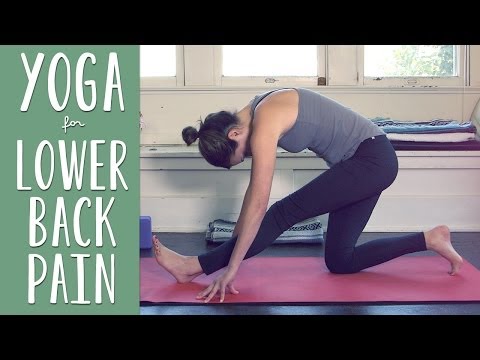
You can also check out the following YouTube video, which might be useful to learn yoga for lower back pain:
Conclusion:
In conclusion, incorporating yoga to relieve back pain can not only strengthen your core but also improve your posture, potentially reducing lower back pain. It is important to be aware that certain yoga poses are more effective than others in addressing lower back issues. By practicing targeted yoga poses regularly, you can enhance your overall well-being and find relief from back pain.